
September 29, 2016


July 28, 2015
DIY Wreath for summer

Well its almost the middle of summer here, rather the late summer. But I was so busy with everything else and enjoying summer days that I was just delaying to write this post and sharing this awesome and easy to make wreath that I made in a single afternoon on which it poured heavily like crazy. Normally I don't mind going out even in the summer showers, but lately we were getting lot of showers, and this day it poured like crazy. So I utilized the indoor time and with the creative juices flowing, I made this. Actually I got this idea from a video on the blog Do It On A Dime.
This is hands down a super duper easy wreath to make yet the result is stunning and the best thing is it does not cost you a fortune at all. It is all together below $12 only, and the materials are mostly from Dollar store.
So here are the supplies needed:
- An old wreath form from a thrift store
- 6 dollar store hydrangea artificial flower sticks (I chose 3 from each colors, pink and purple)
- Few decorative branches(optional)
- A matching ribbon
- A pair of scissors(better if, shears)
Now, I thrifted the wreath from a nearby thrift store and it was only $2 and its quite a big one,a 12" wreath. Then the flower twigs were a buck each so total $6, and the ribbon I had in my stash from earlier projects.
Now, one tip while choosing the flower twigs I chose those flowers which has a multiple no of stems bearing flowers, and hence I needed lesser no of bunches and thus saved lot of money. Moreover Hydrangeas look really nice.
I was so excited to start the project that I forgot to take pictures while putting it together, but I am giving the directions below, trust me its really easy.
- Now since I got the wreath base from a thrift store I had to clean it up, and tie up some loose parts ,but for the new ones there wont be any.
- Then I took the flower bunches and cut out the small twigs, so that each twig will have a few bunches of flowers. P.S. I left a little extra part of the each twig and curved it a little bit so that it become easy to tuck in the wreath form.
- As you can see, I arranged the pink and purple flowers alternatively as I carried on tucking them firmly in the wreath form and spread them evenly.
- I also added these small little details of theses decorative twigs having small white and pink balls glued to it,that I got from the original old wrath.I threw off every thing else as they were in pretty bad shape, except these ones.
- Then I added some blue ribbon I already had, and tie it in the centre and voila the wreath is ready under an hour.
So friends let me know, what do you think about it in the comments below, I would love to read them. And if you guys also try something like this also leave the link, I would love to see them too.
And thanks to Do it on a dime blog for sharing such an awesome tutorial, and providing the inspiration.
Remember to pin this to pin this to your Pinterest DIY or Summer decorating ideas or summer wreaths boards and also can follow me on Pinterest.
July 16, 2015
Cilantro lime cucumber salad
As recently I am having huge productions of cucumber from our little garden that I planted in the spring, I was constantly exploring for the different things that we can do with cucumber other than just using it in salads or sandwiches.
I was looking for a simple easy to make , but a salad little bit different and healthier,and with a little kick.So I looked up the Internet and found this.I adjusted the portions according to my taste and liking.So I made this simple salad,and it was perfect for our taste, and immediately became a hit in my family.

Recipe:
Ingredients:
I was looking for a simple easy to make , but a salad little bit different and healthier,and with a little kick.So I looked up the Internet and found this.I adjusted the portions according to my taste and liking.So I made this simple salad,and it was perfect for our taste, and immediately became a hit in my family.

Recipe:
Ingredients:
- 2 medium sized cucumbers,peeled the skin off
- 1 small green hot Indian chili, finely grated
- 1 garlic clove,finely grated
- freshly crushed black pepper powder
- freshly squeezed lime juice 3 tbsp
- salt to taste
- sugar 1 tsp(optional,but adds a balance in taste)
- cilantro leaves 1 cup,chopped finely
- 1 tsp olive oil
- 1tsp red chili flakes
Peel and wash the cucumbers,and slice them in very thin round slices.
In a small bowl, mix the lime juice,garlic paste,salt ,black pepper powder, green chili , sugar and the extra virgin olive oil,and stir well.
In a small bowl, mix the lime juice,garlic paste,salt ,black pepper powder, green chili , sugar and the extra virgin olive oil,and stir well.
Then to this dressing mixture fold in the chopped cilantro leaves and leave it for 5 mins ,and add the red chili flakes.
Then add the cucumber slices,and mix well. Let it sit for few mins .Voila,your refreshing cucumber cilantro lime salad is ready.
It can be served chilled or as it is.
I would say the salad is at the same time refreshing in the summer days as well as low in calorie. The lime juice is rich in antioxidants and cucumber itself helps in digestion and also extremely good fruit for those with diabetes.So enjoy this summer salad.And in the comments below let me know what is your favorite salad in summer,or if you have tried this yourself and whether liked it or not.
It can be served chilled or as it is.
Enjoy.


June 18, 2015
My goto tomtato soup recipe

servings:2
Time to cook:35mins
Ingredients:
tomatoes: 4medium sized
onion:1 medium sized chopped
cloves :2
chicken broth :1 cup low sodium
butter :1to 2 tbsp
all purpose flour: 2tbsp
sugar 1 tsp
salt to taste
green onion:1 chopped for garnish.
In a stock pot,or a deep bottom pot ,over medium heat add the onions just saute for 3 secs and add the tomatoes and cloves and chicken stock.
Bring it to boil and keep boiling for 20 mins and until the tomatoes get fully cooked and mushy.
Remove from heat and put this mixture in a blender and blend very well so that it becomes smooth ,paste like consistency.
Next in an empty stock pot melt butter and add the all purpose flour and stirr well so that no lumps form.
then gradually add the tomato mixture to this ,and blend very well.
Then add in the sugar and season with required salt and pepper.
Sprinkle the green onion on the bowl and enjoy the warm and tangy tomato soup.
If you want to add some crunch you can add some nice and crispy seasoned croutons and eat it along with some toasted breads.Since that day I happened to have run out of the slice bread so ate it with some left over croissants. Either way it tastes good.
This is my handy dandy tomato soup recipe, yet tasty and yummy .My kids love it too.So friends whats your favourite and go to dinner or soup recipe?


April 06, 2015
Yummy hot chocolate

Hot chocolate is always special,especially when the outside temperature dips down to several notches below 32 F and yes, you are too lazy to move from the special spot in your warm couch, for more than say 5 minutes.
For all those who feel the same ( yeah I know, most do), here is a quick fix recipe for some all-weather- all time yummy Hot Chocolate:
Ingredients:
1 1/2 cups of Whole Milk
1/2 cup of Heavy Cream
½ cup of Bittersweet Chocolate, chopped
2/3 cup of Milk Chocolate, chopped
1 tbsp of Sugar
1/4 tsp of Vanilla Extract
½ tsp of Instant Espresso Powder
Whipped Cream, optional
Method:
1)Take a sauce pan, add the milk and cream.
2) Heat together over medium heat until the mixture is almost at the boiling point. Do ensure, it doesn’t boil.
3) Take it off the heat and add the both chopped bittersweet & chopped milk chocolate along with the sugar, vanilla extract and espresso powder.
4) Let sit for one minute and then whisk,
5) Put the mixture back on the heat to let it simmer a bit and mix well.
6) Serve yourself in your FAVORITE mug with some whipped cream topping. ;)[though I did not add it to make it little skinnier]
And voila, it’s done,the key to added comfort is in your hand and hours of laid back Sunday comes free totally. Now, only if they cud make robots to make some Hot chocolate , I cud have flipped a few more pages thru the magazine by then. Am SOO hard working u know. :P
December 11, 2014
Tiny little things that make one happy ~
As a beautiful long weekend passed by and another one comes to close - I was trying to spend some quiet time sipping my coffee and reflecting on the past years (which right now is a real luxury) - things have moved so quickly that I hardly got time for myself and my blog. I did not stop quilling all this while but haven't got enough time to do as many projects I would do and to post it here. As I was going through the old pictures, I found these among them.
These are the pictures of the card ,I made for a friend of mine in 2013,that I never got to post here. So now they are here....

This is quiet a simple design. I used 1.5 mm paper strips ,cut all by myself using my handy-dandy paper cutter.I wish I had a thin glittery ribbon either silver or golden which could have given this simple motif a bling.
August 25, 2014
Trying a healthy snack idea

Yeah! it is as healthy as it could get. Its a snack loaded with all the good stuffs like the calcium , vitamins (mostly C),antioxidants and so on. It also has a supply of little amount of fructose which in my opinion is not always the bad guy. After all you gotta provide the body some substrates to use to perform all the daily chores and hard works, to cut short to get some energy. No I am not going to babble on the terms and technicalities. But most important thing that we need to know is it has all the goodness but minus the heaping calories and easy-peasy to prepare.

As far as the ingredients are concerned ,it has only three of them,
plain low fat yogurt,
couple of blueberries thrown into the yogurt base,
and one tbsp. of pure honey.
Mix these together and you are ready to have it.
This is that easy yet delicious.
July 14, 2014
A lacy frock for the little one


I enjoyed so much crocheting this dress. For me it is always something very special and touching about making something on my own for the little one.

I always kinda wanted a red dress for my cutie so, red became the highlight of the dress.
I am both pleased and disappointed with it. I’m pleased because it looks cute and the pattern is not complicated, but I’m disappointed because my baby dress didn’t come out its intended size. I made a mistake by choosing worsted weight thicker yarn while I should have used something lighter. The intended size was 0-3 months, but the finished size is about 6 months. What is more, the dress came out somewhat heavy and bulky,still looked pretty on my baby.

April 30, 2014


April 16, 2014

April 03, 2014
Dreamy - Creamy - Rich Parfaits for a weekend of rediscovery !

Weekends are meant to unwind.. yeah ... time for mostly relaxing and a bit of shopping maybe. Well, last Saturday I realized, weekends have also become more like a routine... and oh no !! it is has become too predictable!!!
So I decided, its time for some change..., and rather than wasting time doing laundry, going out, Saturday evening should spent chatting and reminiscing our years and the fun time we have been having as a couple !
But a good chat(we call it "adda" back in India) is always incomplete without some fast-food and so I planned to make some burgers and rich-dreamy-creamy parfaits !!
well, parfaits are one of my favorite dishes, as its tasty, easy to make , simple ...and most importantly, leaves a signature of happiness and cheerfulness in the heart !
My plan was to make about 6 servings in 6 ounce glasses( so that we feel we had plenty of them !) . It could also be served as 4 servings in 10 ounce glasses ! So I scanned through my kitchen, and a smile rang from ear to ear !! yeah!! all the right ingredients were perfectly sitting in the shelves !
I took about :
16 fl oz whipping cream, cold,
2 tablespoons sugar
1 box of jello chocolate pudding for , divided use
24 all natural chocolate-vanilla oreos and crushed them into chunky consistency,
1 (1ounce) square semi-sweet chocolate, to shave for garnish
However, I am not going to say how much I kept eating from the jars though. :D While my husband kept reminding me the first meal I cooked for him, I was busy preparing the dish.. Yet, I could spare enough attention to talk to him! that's the beauty of this dish !

Preparation:
In the bowl of a mixer (or using a hand-held) I added the incredibly tasty cold cream and began whipping. Once it thickened slightly, the sugar was sprinkled in and finished whipping just until stiff peaks formed, and then set it aside for a moment.
-In medium bowl, 2 cups of the chocolate pudding was added (reserving the remaining pudding).Then i began adding the whipped cream to it in several dollops, gently folding in to maintain a fluffy and light consistency.
This is the “chocolate mousse” part of the dessert-the heart of the dish. Once all whipped cream was, incorporated, I set it aside and prepared glasses.
To Assemble (for 6 servings in 6 ounce glasses):
-Began by placing equal amounts of the wonderful crushed cookies to the bottom of each glass (about 3 tablespoons),
-Then added next the yummy chocolate pudding layer(about 3 tablespoons),
-next layer had the dollops of “chocolate mousse” (about 3 tablespoons);
-repeat this process again for each glass, by adding the mouth-watering layers of crushed cookies, then the pudding, then the “chocolate mousse”.
-finally finished the assembly with a sprinkling of crushed cookies and a decorative dollop of “chocolate mousse”;
By the time I had started garnishing, yes! I could hardly wait to start trying the delicious parfaits! But a cook has some duties after all :D
The parfaits were garnished by shaving a little of the semi-sweet chocolate square with a vegetable peeler over the tops of each glass (improvisation- the mantra of success in kitchen ;) and refrigerated the beauties until ready to serve. Well, these folks can be serve immediately too, depending on your taste and craving !
To Assemble (for 4 servings in 10 ounce glasses):

-Follow assembly instructions above only increase the quantity of each layer to about 5 tablespoons in order to fill each glass.
Once the rich parfaits were chilled enough, we took them out for eating...and yes, we talked our hearts out... and the cute little parfaits were the perfect companions
March 26, 2014


January 27, 2014
Shrimp scampi with angel hair pasta

Ingredients:
1 pound angel hair pasta
4 tbsp olive oil
1 pound large shrimp, peeled and deveined(I got the frozen ones)
4 cloves garlic, minced
1/2 teaspoon red pepper flakes
1 lemon, juiced, plus 1/2 lemon, zested
5 tablespoons butter
1/4 cup dried parsley leaves
Directions
Add the pasta to a large pot of boiling salted water, over medium heat, and cook until al dente.
In a separate bowl marinate the thawed shrimps with a pinch of salt and pepper and a pinch of turmeric (especially to suite the taste of Bengali's,one can easily omit that).
Meanwhile, heat a large skillet over medium-high heat. Add the olive oil.
Once hot, add the shrimp and saute until just cooked through, about 2 to 3 minutes. Remove to a plate and reserve. Add the garlic and red pepper flakes to the skillet, then saute for until the garlic is fragrant, about 1 minute. Add the lemon juice and raise the heat to high. Let the liquid reduce for 2 to 3 minutes. Whisk in the butter, add a ladleful of the pasta cooking water and return the shrimp. Remove from the heat.
Drain the pasta, and add it to the skillet along with the dried parsley as a part of seasoning and toss. Add the lemon zest and adjust the seasonings with salt and pepper, to taste. Transfer to a serving platter

August 23, 2013
A recycled craft for the home

Hi all, here is another cute project to gear up the home. Here it is a totally recycled project where u can turn trash to treasure.Though this is pretty self-explanatory, yet, I made the 3 panels from the cardboard cereal boxes, cut into desired measures. I decked up these panels with the letters, cut out from the colorful pages of the magazines that stocked up at our storage. As a paper lover I collected quite a few airport magazines from our latest international trip.These magazines are particularly loaded with a lot of colorful ads, and hence served a good purpose in decorating these panels,too.
These letters kinda gave it a collage look.
I also tried to create a 3D effect with the letters 'O' and the polka dotted blue ribbon is completely adorable adding some cutness to it. Its from Target. Here are some snaps of the wall hanging in making.


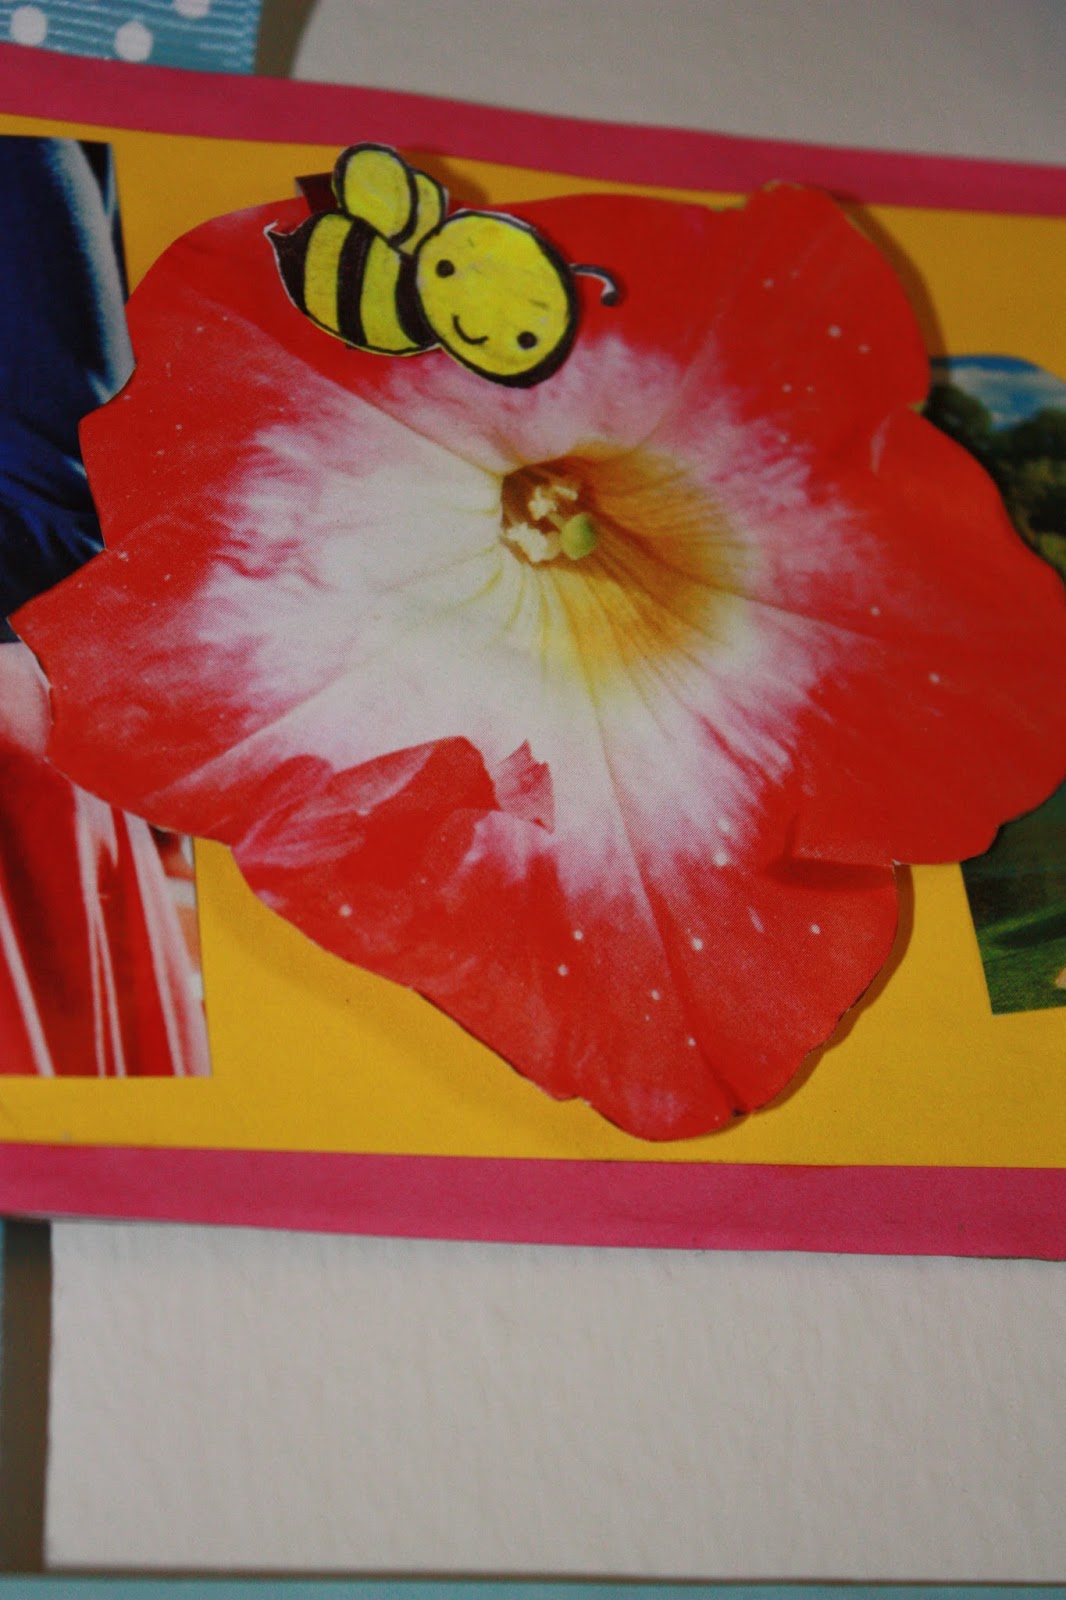
Hope you guys like it. Let me know if you have any comments!
Cheers,
Creativebee.
August 15, 2013
Horses in the valley - glass painting in one evening

There are some days when you feel a sudden rush of energy flowing through your spine, that you jump out of your couch and do something which you have never thought of doing in one evening.
Here it is. I usually have all my painting materials ready in hand keeping only the plot in my head, marinated for some time to be cooked on canvas. One evening, when I was about to complete my one month pending novel, struck by this picture of running horses in a valley. And I felt like, it somehow naturally resembled my energetic feeling with the plot of this picture. So, finally I got it painted in a piece of glass in one go.
I used a 1 ft x 1.5 ft china glass (from a local glass market), "Reeves" acrylic paints (from Blick Art Materials, Chicago), black outliner (from the same shop above) and 2 paint brushes (#2 and #3).
Since the final product would be a mixture of so many colors and compositions, it was hard to put the colors in proper order. If you want to see white on top and then and shade of yellow to visualize the wave, you should apply the colors at the back of the glass rather than the front face of it. So, you can imagine the whole picture was colored in reverse order they way the shades are seen.
This painting is yet to be framed.
Hope you guys like it. Let me know if you have any comments!

July 30, 2013
Beginners' polka dotted nailart

This is an easy look to recreate that doesn't require too much steadiness.
STEP 1
Apply 2 coats of your choice of nail polish.Here I used the lakme polish in N236,a warm purplish-pink.
STEP 2
Take your white polish or a light colored one like I used a very light pink from wet n wild and with the dotting tool create a line of dots evenly spaced in the middle of the nail
STEP 3:
Do another line to the right of the first line and also on the left of the first one and try to space the dots to fall between the dots of the first line.
STEP4:
Then I used the white nail /light pink polish to draw lines connecting the polka dots.
STEP5:
Then I added smaller sized polka dots on top of the bigger dots. I just used the smaller tool to create smaller dots. The blue I used is a dark navy polish from Maybelline denim collection.

STEP 6:
Let it dry thoroughly before applying a topcoat. You don't want it to smear!


N.B. Though it is fairly easy one to do,mine one didn't turn out that good.probably credit to my unsteady hands or the short nails.But believe me it is pretty easy and do look good if done well.
Dear fellow bloggers and visitors do comment.
Cheers,
Creativebee.
July 26, 2013
Lakme True Wear Nail color: FreeSpirit N236 Narendra Kumar: my experience
Happy Friday everyone! Here's a little review and my take on a nail polish , I picked up quite awhile ago.
this Lakme true nail color range is the good old range that I have been using since my teenage days.

Price:Rs 95 for 9ml.
Packaging:This comes in the traditional good old Lakme nail paint packaging with a beige cap.
My Opinion:-
I am a nail paint lover and therefore I try to keep buying different nail colors from different brands while also being on tight budget.
These nail polishes come in wonderful shades and every year Lakme launches new shades as part of a designer collection and this shade is from their famous Narendra Kumar collection.
This shade is in N236.
It is a warm plummy pink very close to purple shade. It has a Very nice glossy-thick finish to this one, almost a creamy/milky jelly finish and luckily without any shimmer.
The formula on these are very good. They apply evenly with zero effort and they dry very quickly. I have no complaints about the formula. All are opaque in two coats and that's what I'm wearing here.
The nail paint has a nice flowy liquid texture which is neither thick nor runny.It dries to a creamy finish with a glossy touch but the glossiness fades in 3-4 days of application without a top coat. The nail paint lasts long on my nail. With proper care and minimal work the nail-paint can stay fresh and last a week and a half easily.
In my case,it stayed without a top coat for 4 days with minimum chipping and fading and lost of household chores and dish washing especially,after which it fades off from the tips which is acceptable.
Nail color with flash:

Pros:-
Cons :-
Its a beautiful shades just right for the winters and ,fall.This color will suit mostly fair and wheatish skin tones with ease. Its a must try for those who love pinks.I am in love with it,and planning to do a nail art with this too. :D
this Lakme true nail color range is the good old range that I have been using since my teenage days.

Price:Rs 95 for 9ml.
Packaging:This comes in the traditional good old Lakme nail paint packaging with a beige cap.
My Opinion:-
I am a nail paint lover and therefore I try to keep buying different nail colors from different brands while also being on tight budget.
These nail polishes come in wonderful shades and every year Lakme launches new shades as part of a designer collection and this shade is from their famous Narendra Kumar collection.
This shade is in N236.
It is a warm plummy pink very close to purple shade. It has a Very nice glossy-thick finish to this one, almost a creamy/milky jelly finish and luckily without any shimmer.
The formula on these are very good. They apply evenly with zero effort and they dry very quickly. I have no complaints about the formula. All are opaque in two coats and that's what I'm wearing here.
The nail paint has a nice flowy liquid texture which is neither thick nor runny.It dries to a creamy finish with a glossy touch but the glossiness fades in 3-4 days of application without a top coat. The nail paint lasts long on my nail. With proper care and minimal work the nail-paint can stay fresh and last a week and a half easily.
In my case,it stayed without a top coat for 4 days with minimum chipping and fading and lost of household chores and dish washing especially,after which it fades off from the tips which is acceptable.
Nail color with flash:
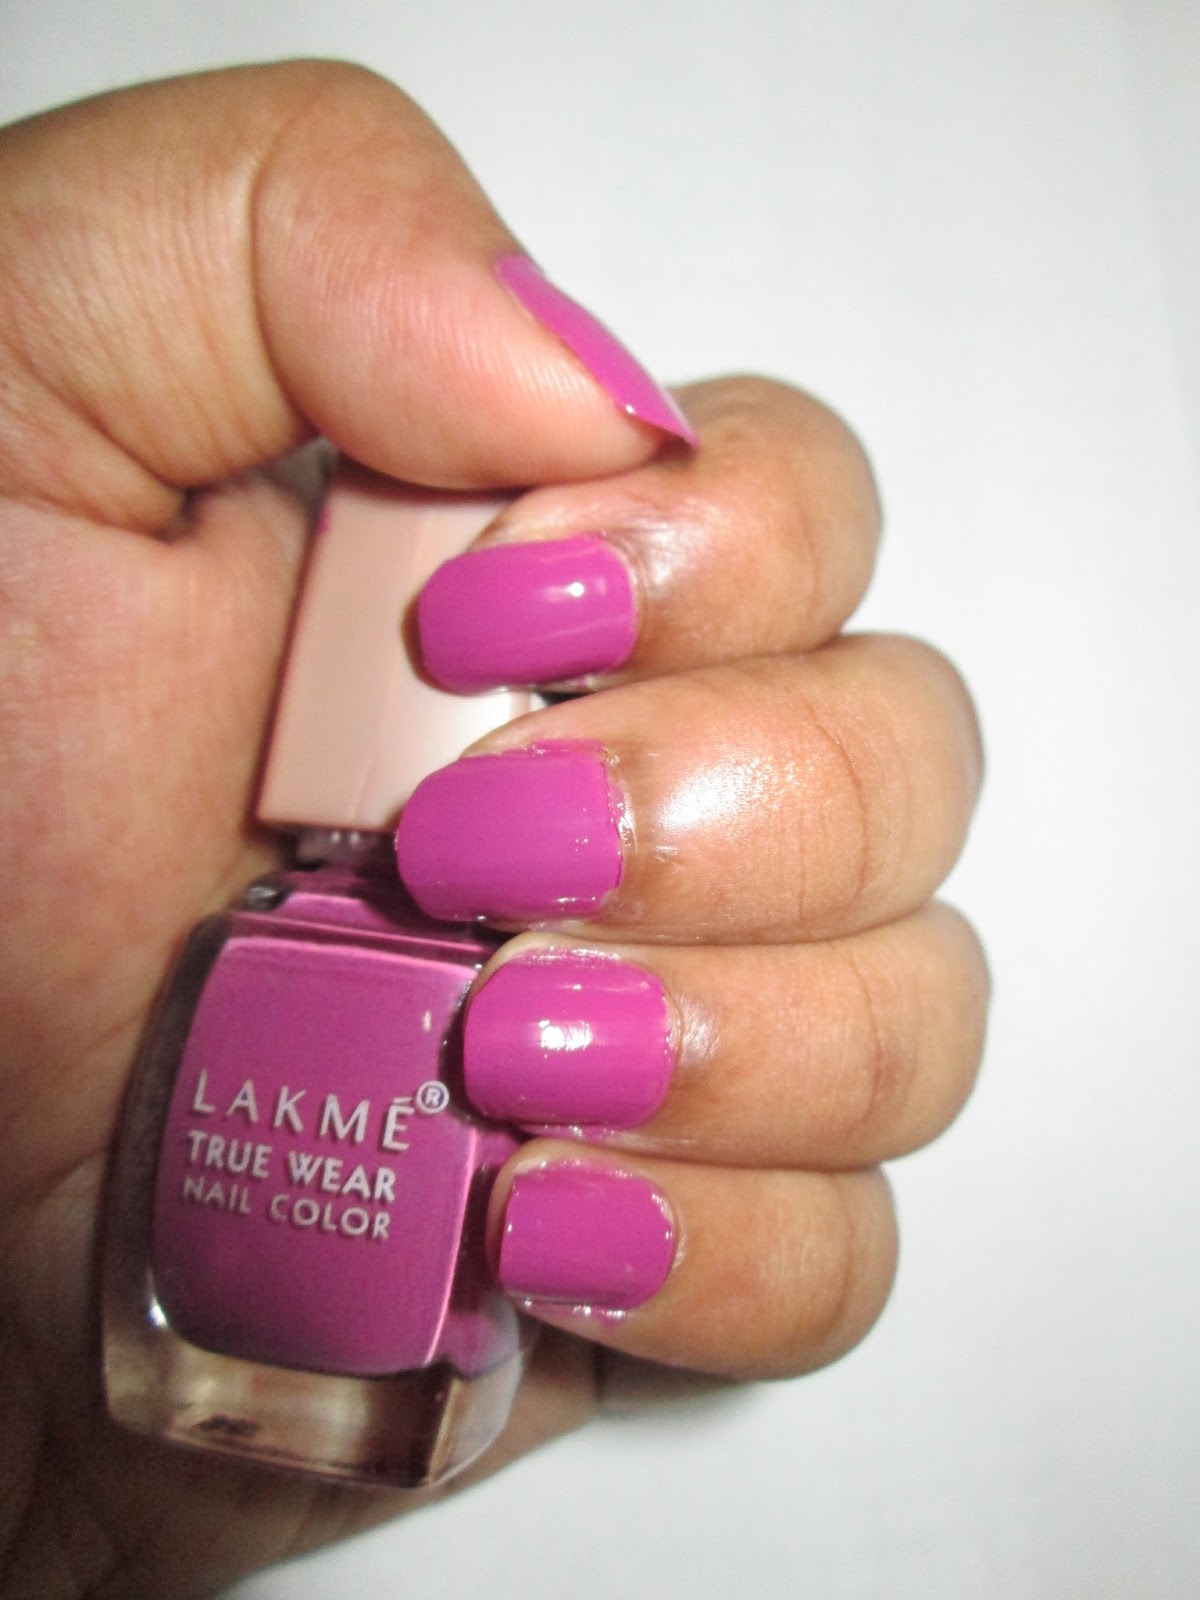
Pros:-
- Adorable plummy-pink shade with no shimmers
- Applicator brush gives an easy and even application
- Commendable staying power.
- Well-pigmented and gives a very opaque coverage in 2 full coats.
- Dries up quickly but not super-fast.
- Gives a nice glossy creamy finish to the nails but the shine fades off.
- Available in large number of shades like browns, Pinks, Mauves, Reds and Maroons.
Cons :-
- If you do a lot of household chores, the nail-paint starts fading off from the nail-tips by the end of 3rd day.
- The nail polish has become slightly thick over time.
- The shade gets darker with each coat. So, if you go for multiple coats of the shade it may turn weird and tacky,.
- Astonishingly the beige cap of my bottle got separated from the inner part of the cap ,leadind to slipping away from hand and falling.
Its a beautiful shades just right for the winters and ,fall.This color will suit mostly fair and wheatish skin tones with ease. Its a must try for those who love pinks.I am in love with it,and planning to do a nail art with this too. :D
July 18, 2013
Reverse glass painting: crane

Hi everyone! Just wanted to share another of my glass paintings.I got the inspiration from a painting over the Internet. The painting is approximately 8"by 10". Its actually one of the first of reverse glass painting in which I tried using acrylic paints. It was quite a challenge to create the shades on the cranes body.One of the advantages of acrylic paints is one can create any shades by blending the colors which is quite difficult in case of glass paints. Anyways though I know this one has lots of imperfections,still I liked how it turned out,,am willing to try some more from time to time.It gives a bout of greenery,and brings freshness to my old room in Kolkata.
Cheers,
Sumitra
July 17, 2013
Dressed -up Digits
Hi Everyone!!! It's a gorgeous day out today. We've got a bright sunny day--it's in the low 80's.Today I was clearing and organising my stash of cosmetics and jewellery as my in laws are supposed to come in few weeks,so i was doing some cleaning around.While going through the nail polishes,this idea struck me.
I have always had a great love for and been passionate about nail polishes,I love learning more and trying out new things.But yet I am not very much into very vibrant neon colors as is the trend these days,so I have got none like that in my collection.
Even from those I tried to create a nail art that I originally found in pinterest.the colors are not the same but similar.This is the result.Its my first ever try on nail art.I know,its a bit clumsy.


No matter how hard I tried I felt my lines were not crisp enough.And I don't even have any nail art tools at my disposal also.All I did was drawing free hand with the nail polish brush.
Anyways I kind of liked it.and wish to try some more in future.
For this I started with a base coat .then a solid coat of
the icing polish in Bordeaux except the ring finger.I painted the ring finger in street wear color rich enamel in Blue bell.then I free handed the color blocking with the Sinful colors and the same blue.
 the original pic from pinterest is like this,

I have always had a great love for and been passionate about nail polishes,I love learning more and trying out new things.But yet I am not very much into very vibrant neon colors as is the trend these days,so I have got none like that in my collection.
Even from those I tried to create a nail art that I originally found in pinterest.the colors are not the same but similar.This is the result.Its my first ever try on nail art.I know,its a bit clumsy.


No matter how hard I tried I felt my lines were not crisp enough.And I don't even have any nail art tools at my disposal also.All I did was drawing free hand with the nail polish brush.
Anyways I kind of liked it.and wish to try some more in future.
For this I started with a base coat .then a solid coat of
the icing polish in Bordeaux except the ring finger.I painted the ring finger in street wear color rich enamel in Blue bell.then I free handed the color blocking with the Sinful colors and the same blue.


July 12, 2013
what I am loving these days!
Hi all,How are you all doing?
After a long long time! My dear blog has been so neglected in the past few months..so much going on in my life right now..and with a baby coming around ,and lots of shifting,things as it is aren't very easy..crafting has to take a backseat.But still I was all determined after my last post to blog at least once in a week, but no,that did not happen. I know I am being very lazy these days,but cant help,my body is demanding rest.
This is yet again a short and super quick post.
This is about a candle that I purchased recently at Walmart,that I am greatly enjoying these days.For sometime I have heard about the candles from Better Homes & Gardens at Wal-Mart!but never got them actually.This time I did get one. These big 18-ounce jar candles cost right around $5.Plus there were others too in a set of 6 both small and big ones mixed for just 10 bucks.Quite a deal.Moreover there is a wide variety of fragrances to choose from.I got mine in tropical plumeria petals.It has got a kind of tropical flowery distinct scent,which is not too strong but not to feeble,yet refreshing and soothing.

I love these candles because they're big & burn a long time... but they also truly smell-up a room! (is that the right terminology? ha ha) After they burn for awhile and some hot wax develops at the top of the candle- they're just so fragrant. And I love my flame less candles... but I still really enjoy the look & scent of one of these lovely candles!

After a long long time! My dear blog has been so neglected in the past few months..so much going on in my life right now..and with a baby coming around ,and lots of shifting,things as it is aren't very easy..crafting has to take a backseat.But still I was all determined after my last post to blog at least once in a week, but no,that did not happen. I know I am being very lazy these days,but cant help,my body is demanding rest.
This is yet again a short and super quick post.
This is about a candle that I purchased recently at Walmart,that I am greatly enjoying these days.For sometime I have heard about the candles from Better Homes & Gardens at Wal-Mart!but never got them actually.This time I did get one. These big 18-ounce jar candles cost right around $5.Plus there were others too in a set of 6 both small and big ones mixed for just 10 bucks.Quite a deal.Moreover there is a wide variety of fragrances to choose from.I got mine in tropical plumeria petals.It has got a kind of tropical flowery distinct scent,which is not too strong but not to feeble,yet refreshing and soothing.

I love these candles because they're big & burn a long time... but they also truly smell-up a room! (is that the right terminology? ha ha) After they burn for awhile and some hot wax develops at the top of the candle- they're just so fragrant. And I love my flame less candles... but I still really enjoy the look & scent of one of these lovely candles!


Subscribe to:
Posts (Atom)